
The Manage Users page enables you to invite new users to the portal and view, edit, delete, and export information about users in your account. You can also enable or disable Two-Factor Authentication for one or all users. For detailed information, see Two-Factor Authentication.
In this article:
Role Types
Portal users who manage account activity are assigned one of the following roles:
- Admin: Unrestricted access (read/write) to all resources in the customer account.
- Technical: Restricted access (read/write) to the technical resources in the customer account.
- Accountant: Restricted access (read/write) to the billing resources in the customer account.
- Security Analyst: Unrestricted access (read/write) to the security features in the customer account.
For more information on each role's access and restrictions, see Roles and Responsibilities.
Note: Each account should have at least one admin user for each role. If you have more than one, you can distribute portal management responsibilities across administrators.
Viewing Users
- Active Users: Users who accepted the invitation and signed up for the portal.
- Pending Users: Invited users who have not yet signed up for the portal. These users have seven days to accept the invitation.
To view a full list of Active and Pending users in your account:
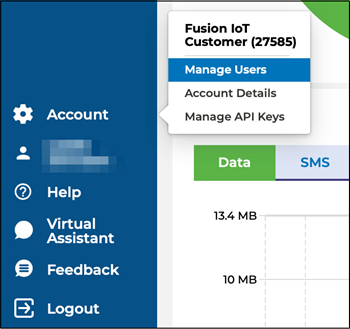
- Log in to the AerPort Portal.
- In the navigation menu, hover over Account and click Manage Users. This
opens the Manage Users screen, which displays a list of Active users by default.
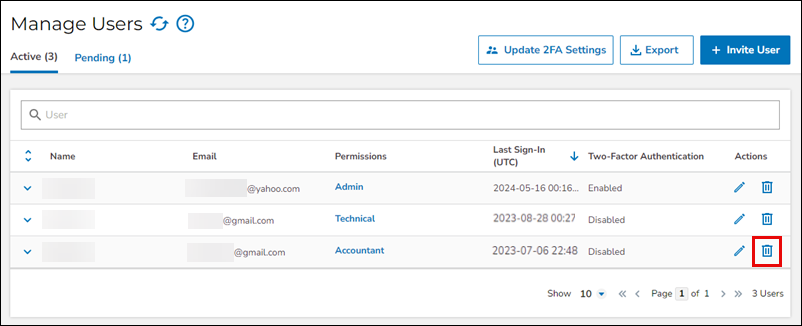
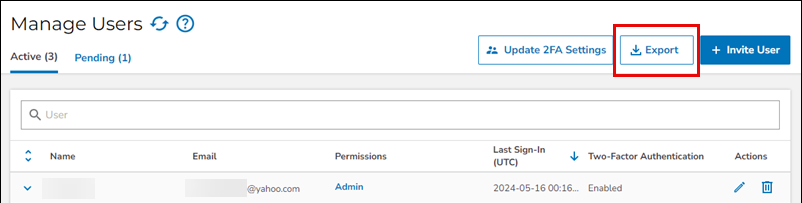
- The Manage Users page provides the following columns:
- Name
- Assigned Accounts
- Permissions
- Last Sign-In (UTC)
- Two-Factor Authentication
- Actions
Note: In the image below, names are blurred to protect private user information.
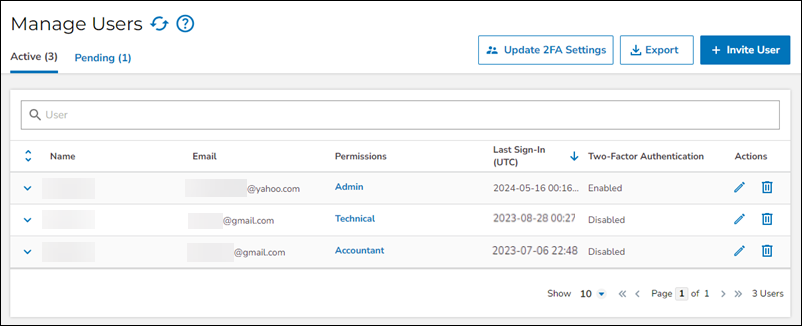
- Name
- (Optional) Click the Active or Pending tab to filter the table by active or pending users.
- (Optional) Click the down arrow next to the user's name to view the accounts this user can view. In most cases, the user can view one account. However, some users may be invited to other accounts, and those users can switch to view a different account using the Switch Accounts menu item.
Editing User Details and Permissions
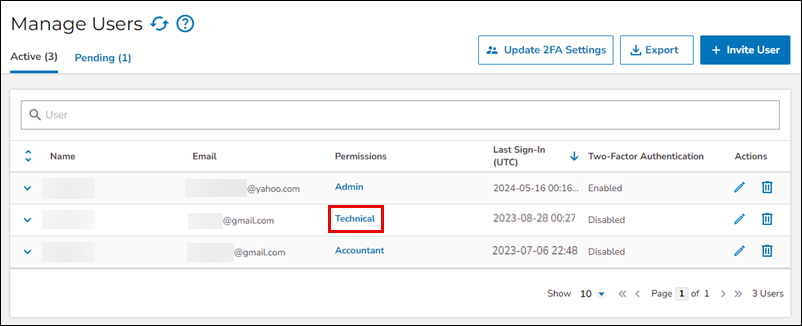
- Click the Active tab, if not selected.
- Click a Permission for a user. This loads the Edit Permission window.
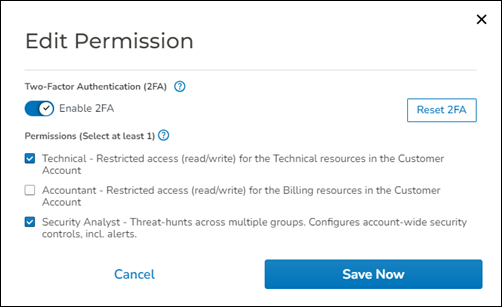
- Modify the permissions or Enable or Disable 2FA as needed, and click Save Now.
A confirmation banner appears.
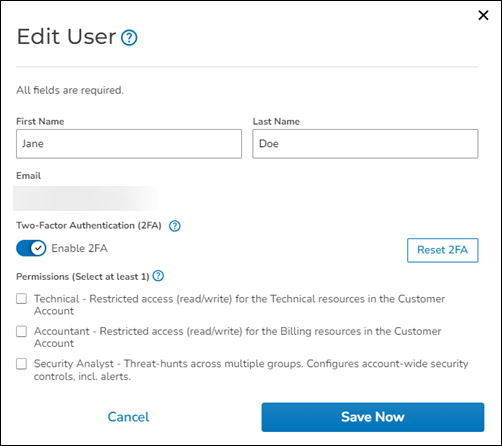
- Click the pencil icon under the Actions menu.
- In the Edit User window, you can change the first and last name, check or
uncheck Permissions boxes, or Enable or Disable 2FA as needed, and click Save
Now. A confirmation banner appears.
Deleting a User
To delete a user:
- Click the Active tab, if not selected.
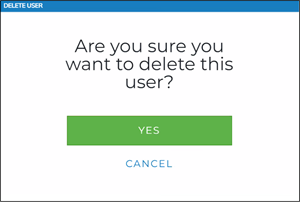
- Click the trash icon on the user you want to delete and select Delete.
- To confirm the deletion, click YES on the pop-up window.
Note: You cannot delete the primary Admin user for the account. Please contact Aeris Support if you need to change the primary user.
Inviting a User
To invite users to access the portal:
- Log in to the AerPort Portal.
- In the navigation menu, hover over Account and click Manage
Users.
- Click Invite User at the top-right corner of the screen. This opens the Invite
User pop-up.

- Enter the new user's email address and check the appropriate permission(s).
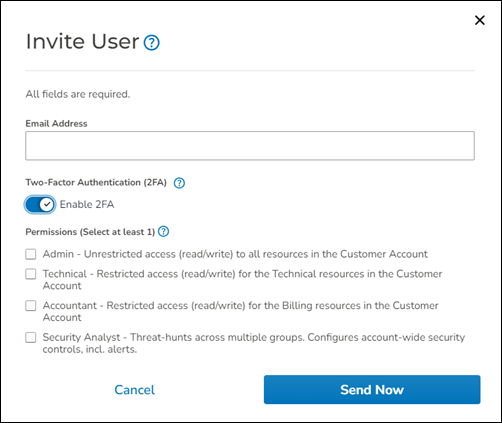
- Optionally select the toggle to enable Two-Factor Authentication.
- Click Send Now. This prompts AerPort to send an invitation email to the provided
address.
Note: Invitations expire after seven days.
Invited users can follow the steps in the Create User Account article to access the portal and create an account.
Resending Invitations
When an Admin invites a user to the portal, the new user has seven days to accept the invitation and create their account. If the user tries to accept the invitation after seven days, AerPort informs them the invitation has expired. Invited users must then click Request New Invitation to request a new invitiation from an Admin.
To resend an invitation:
- Log in to the AerPort Portal.
- In the navigation menu, hover over Account and click Manage
Users.
- Click the Pending tab to view a list of invited users who have not signed up on the portal.
- Locate the the user you want to reinvite and click the arrow icon. A confirmation
banner appears.
Note: Click the trash icon to uninvite a pending user.
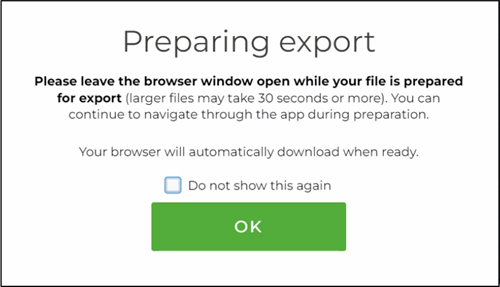
Exporting a List of Users
On the Manage Users page, you can export a CSV file with the
following information about users in your account:
- Name
- Role
- User Status
- Last Sign-In (UTC)
To export a list of users:
0 Comments