
Once your device is connected, you can use the AerPort SIM INFORMATION window to check the status of your cellular connection and verify that data, SMS, and voice services are functioning properly.
Confirming Network Registration
You can view a device's registration status in the Network Status section of the SIM INFORMATION window.
- In the left navigation menu, click SIMs.
- Select a device from the table to load the SIM INFORMATION window.
- Locate the registration status indicated in the Network Status section under
Registered. YES indicates that the device is registered.

- Circuit Switch (CS): Controls SMS and Voice services. Your subscriber information is registered in the visitor location register (VLR) of the carrier network in which you are connected.
- Packed Switch (PS): Controls data services. Registration is indicated by the successful authorization of your device on the serving GPRS Support Node or SGSN of the visited network.
Both the VLR and SGSN are identified by a global title that can be used to determine which carrier you are connected to. The Radio Access Technology (RAT) type indicates the type of network technology your device is authorized to use.
Verifying Data Services
To verify IP data services using AerPort and a 3G device:
- Open the terminal on your computer.
- Enter the following command to set the APN for the internal PDP context on the
module:
apsd=0,1 "iot-eu.air.net." - Enter the following command to save the context information to non-volatile memory
(NVM), so it does not have to be configured each time to show the status of the PDP
context:
upsnd=0,8Note:
0indicates the context index and8indicates the status. The last value of zero indicates that the context is not currently active. You can also see this reflected in AerPort by the yellow exclamation icon in the Data Session section of the SIM INFORMATION page. - Enter the following command to activate the context:
upsda=0,3Note:
0indicates the context index and3is to activate. The return valueOKindicates that the context activation was successful. - Enter the following command check the IP address that was assigned to the data
connection:
upsnd= 0,0Normally, your device will send some data to your IoT application server. You can also proceed to the next step to ensure you are connected. For this example, ping a server to ensure you are connected.
Note: You can also view the active data session and IP address in AerPort. The green check mark icon indicates that your device is in a current data session. You also see the IP address and the time the session started.
- (Optional) Enter the following command to ping a server and test connectivity:
UPING="www.google.com"A valid response from the pinged server indicates a valid network connection. - Use the following command to deactivate the context:
uspda= 0,4You can see this action reflected in AerPort after refreshing the SIM INFORMATION window as indicated by the inactive data session.
Verifying SMS Services
- Configure the device to automatically read the message once it arrives.
- In the left navigation menu, click SIMs.
- Select a device from the table to load the SIM INFORMATION window.
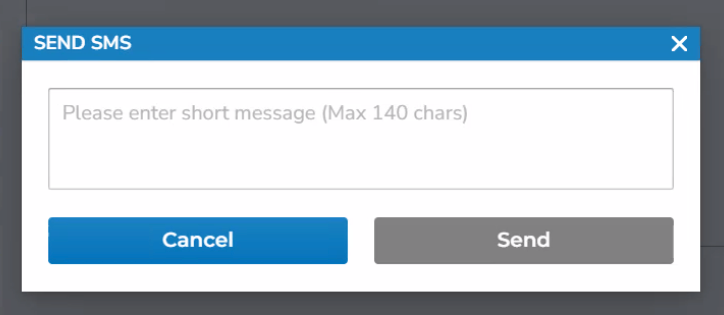
- In the SIM Operations section of the diagnostic page, click Send
Message.

- In the input box, type your test message and click SEND. The status of the
SMS message appears in the status window in the middle of the screen. You should see
the message deliver successfully to your device. The network then sends confirmation
back to AerPort that the message has been successfully processed.
Verifying Voice Services
To verify voice services, you need two cell phones (e.g. your personal cell phone and a cell phone with the Aeris Fusion Global IoT SIM).
Note: If you do not know how to access your IoT device’s voice services, refer to your device manufacturer or your module manufacturer's documentation.
- In the left navigation menu, click SIMs.
- Select a device from the table to load the SIM INFORMATION window.
- Click the SETTINGS tab.
- In the Network Services section, verify that Voice is
enabled.
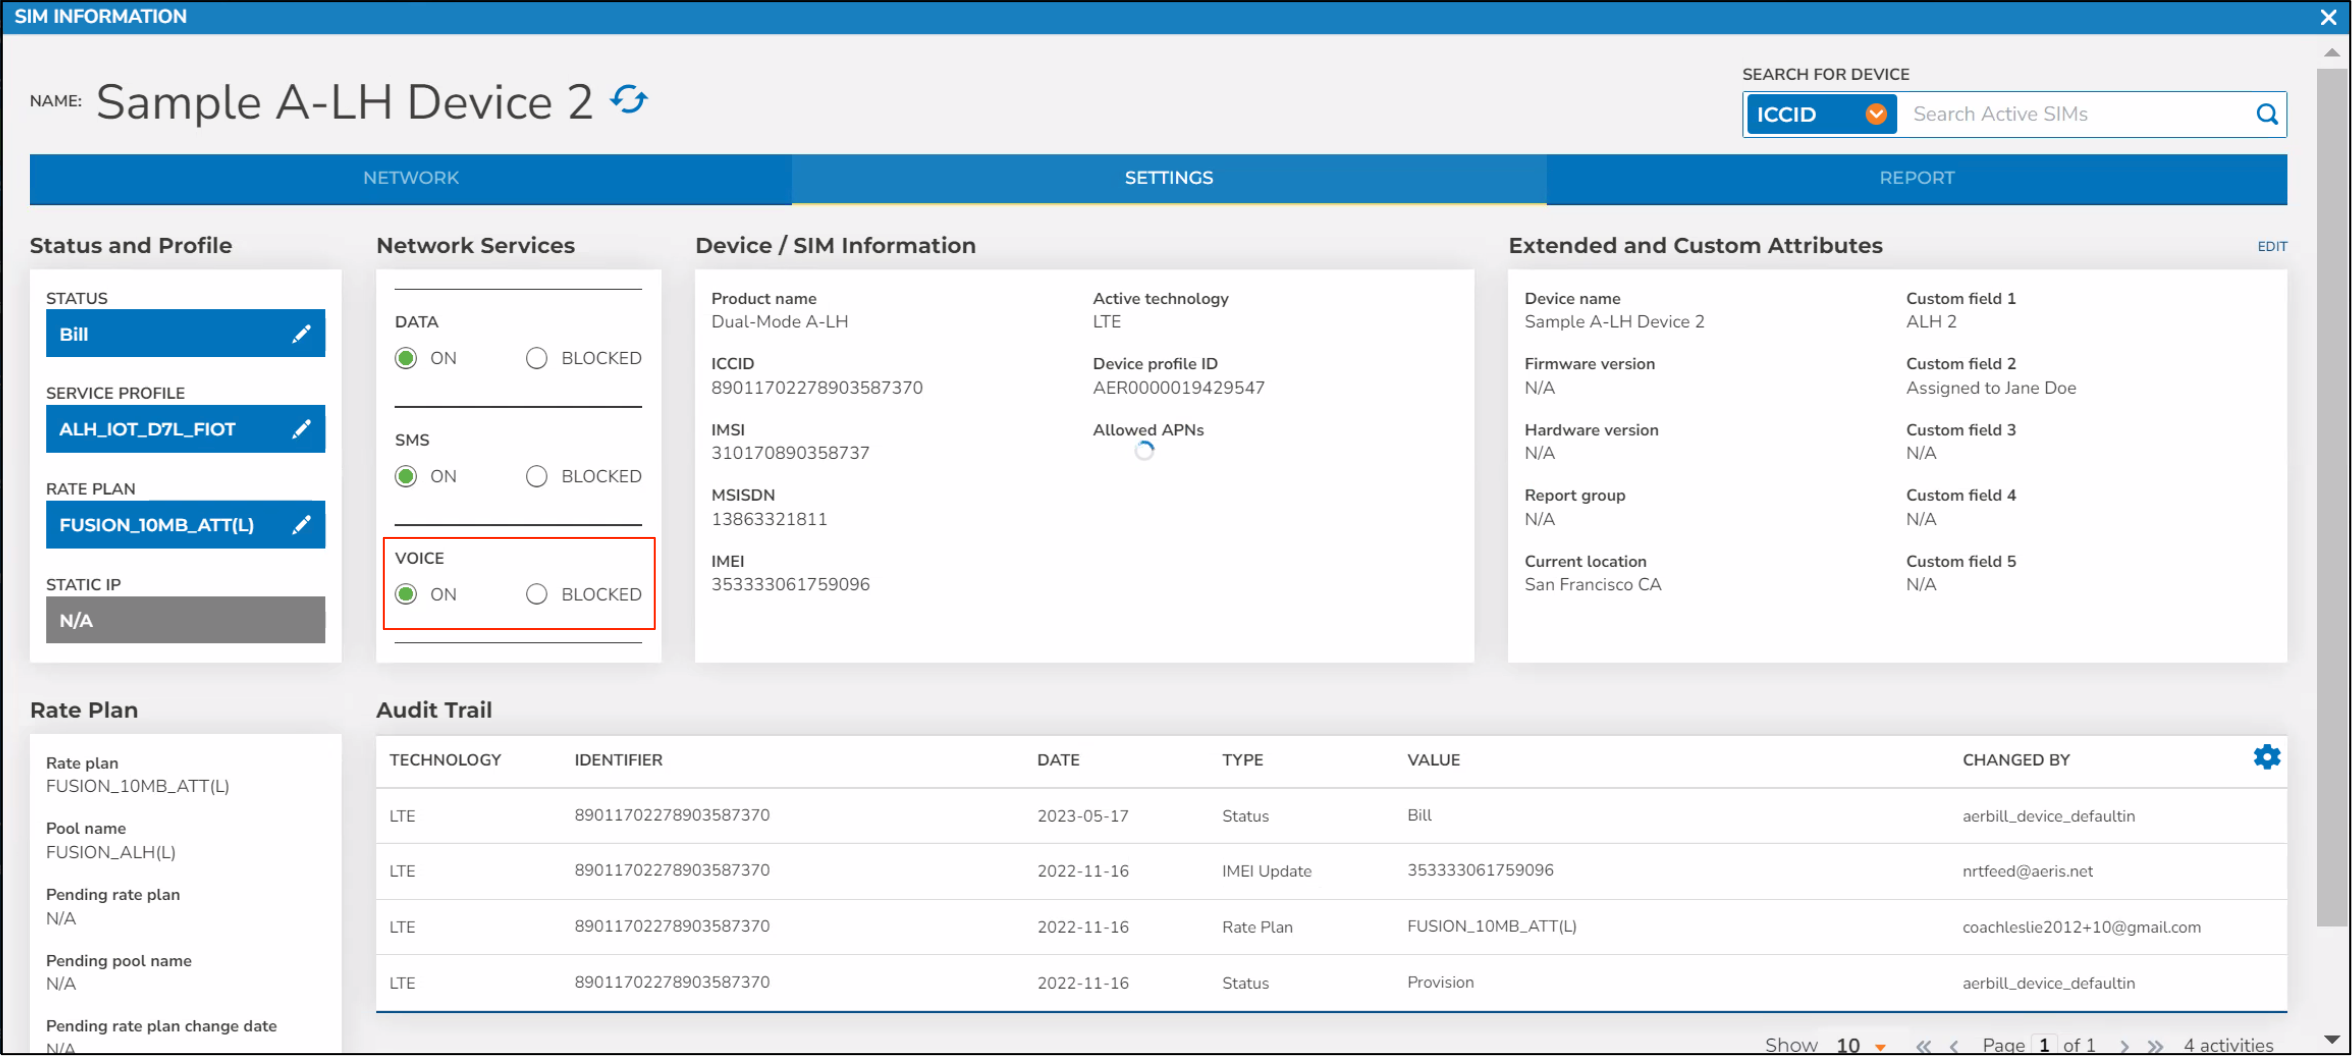
All Aeris SIMs are provisioned with non-viable numbers, which you can find in the MSISDN field. This prevents your device from receiving unsolicited phone calls and gives you complete control of mobile terminated voice services. Even though the device is configured with a non-viable number, mobile originated voice calls can be initiated from your IoT device to any valid phone number.
Note: Mobile terminated voice calls can only be completed securely through the AerPort platform or the Aeris APIs.
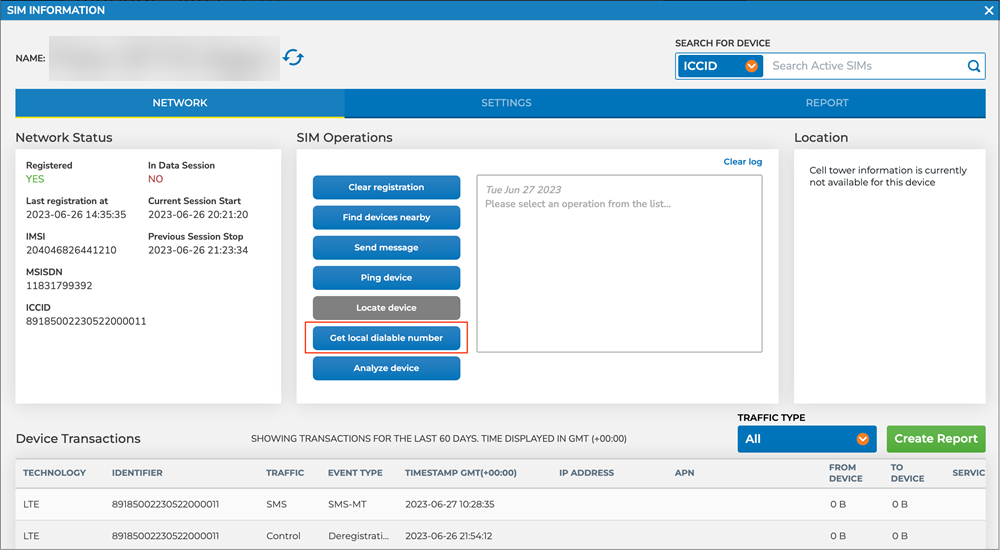
- From the SIM INFORMATION window, click the NETWORK tab.
- In the SIM Operations area, click Get local dialable number to
request a valid dialable number from your device's switch.
Note: This functionality is also available via API and essentially sends a request to the serving switch for a temporary local directory number (TLDN). The temporary number returned is valid only for a short time period, typically around 30 seconds.
- Dial the TLDN from any valid telephone line (e.g. your cell phone).
- Ensure your IoT device receives the mobile terminated voice call. Once you
answer and hang up, the call completes for rating purposes.
Note: All mobile terminated and mobile originated voice calls are rounded up to the next minute.
0 Comments