
The SIMs in your account are accessible to you from the Manage SIMs menu. You can view a great deal of information about each SIM, test communication, edit the SIM attributes, block and unblock traffic, and create reports.
In this article:
Basics
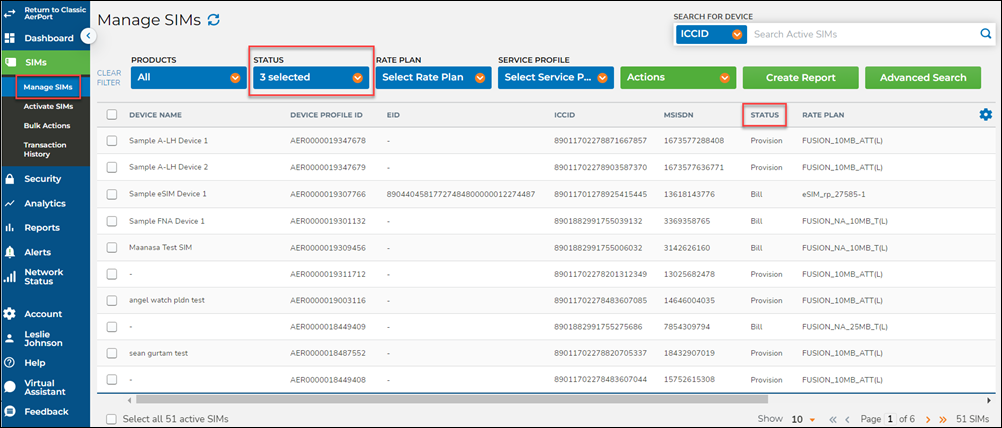
The Manage SIMs screen is available from the SIMs menu. Selecting Manage SIMs displays a list of all the SIMs in your account, except for SIMs that have never been activated/provisioned.
The Status column shows that these SIMs are in a Provisioned, Billed, or Suspended state. Canceled SIMs are not displayed, by default, but you can check Cancelled from the Select Status drop-down. See Viewing a SIM's Cancellation History for details and information on viewing cancelled SIMs.
The Manage SIMs screen lets you perform the following tasks:
- Filter SIMs and select the columns to display on the screen.
- Test communication with the SIM by pinging it or sending an SMS message.
- Clear the registration on the SIM.
- Edit a SIM (change the current status of the SIM, change the rate plan, add custom attributes, or apply a traffic policy).
- Edit many SIMs at once by performing a bulk change.
- View an audit trail of actions performed on the SIM.
- Select one or more SIMs to load on a report.
- Export SIM data to a CSV file.
SIM States
The services accessible to a SIM depend on its current state. This section describes the various SIM states.
|
State |
Description |
|
Provisioned |
SIMs in the provisioned state are reachable through the Aeris network services and can transmit data, however Aeris does not charge a monthly access fee. Any transmitted data is charged at an overage rate as set in your customer contract. The SIM remains in this state until you move it to Billed state, or until the SIM transmits more data than the threshold defined in your customer contract. Provisioned SIMs are considered 'Active' and can be edited. |
|
Billed |
SIMs in the billed state are reachable through the Aeris network services. A monthly access fee to the Aeris network is charged. Usage is billed or deducted from the included amount of data. Billed SIMs are considered 'Active' and can be edited. |
|
Suspended |
SIMs in the suspended state are reachable through the Aeris network services. Most SIMs can still transmit data, however Aeris does not charge a monthly access fee. Any transmitted data is charged at an overage rate as set in your customer contract. In most cases, if a suspended SIM transmits more data than the defined threshold or has been suspended for the maximum time allowed (as set in your customer contract), the SIM is automatically moved to the Billed state. Most suspended SIMs are still considered 'Active' and can be edited. Note:
|
|
Canceled |
SIMs in the canceled state cannot transmit data and cannot be reached through the Aeris network services. You cannot edit SIMs that are in a canceled state. For Fusion NA SIMs, if you intend to use them again, you can use AerPort to provision or reprovision canceled SIMs within 45 days. Between 45 and 60 days, the SIM can still be recovered and provisioned, but only by calling Aeris Support. After 60 days, canceled Fusion NA SIMs are disabled and can no longer be provisioned. These SIMs remain in inventory but will return an error if you attempt to provision them. |
Filtering, Searching, and Selecting Columns

Filtering
The Manage SIMs screen offers several options for filtering which SIMs are shown in the list. Use the blue boxes to select which SIMs to view::
- Products. Note that you will see this filter only if you have multiple products assigned to your account (for example if you have both Fusion NA and Dual-Mode A-LH SIMs). If you have only one product assigned to your account, you will not see this filter.
- Status. By default, 3 status are selected: "Provisioned," "Billed," and "Suspended." You can optionally check "Cancelled."
- Rate Plan. All the rate plans assigned to your account are listed.
- Service Profile. All the service profiles assigned to your account are listed.

Basic Searching
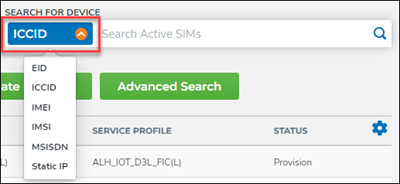
You can search for a particular SIM using one of several types of identifiers as shown in the drop-down list. Reminder: with an EID, you can enter just the last 5 digits of the number into the search bar.
If only one SIM is found, the SIM Information box appears.
If more than one SIM is found, a list of matching SIMs appears.
Advanced Searching
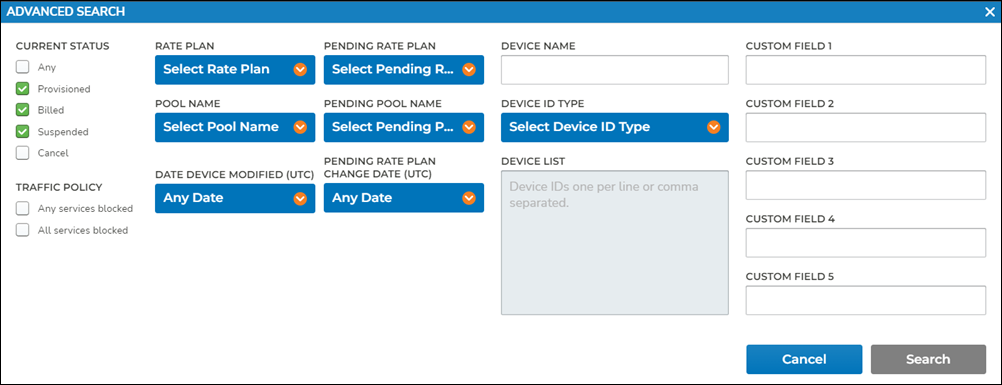
Click Advanced Search to access additional options. Use the check boxes, blue drop-down lists, and text search fields as desired, then click Search. If the Search button is unavailable, this means that your current selections already match the list of SIMs being displayed.
Note: If you are logged into a parent account, Advanced Search offers the ability to search within selected or All child accounts.
Selecting Columns
You can choose to hide certain columns or show additional columns by using the wheel icon in the top right corner of the SIM list. Click the wheel icon to view the available columns, then check or uncheck the columns as desired.
Note: If you show the Static IP column, AerPort will commonly display one IP address. In cases where there are two APNs and two IP addresses for a SIM, the addresses are displayed, separated by a comma.

Viewing a SIM's Cancellation History
Cancelled SIMs cannot be edited, but you may find it useful to see a list of SIM in the Cancel state. Select Cancelled from the Status drop-down list.
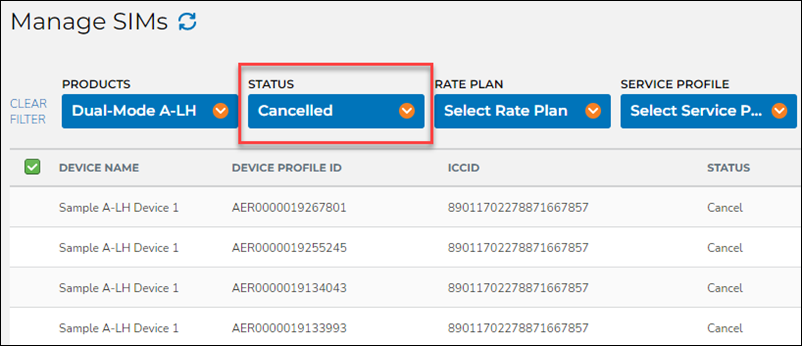
When you choose to view SIMs with the "Cancelled" status, you can see the SIM's complete cancellation history. One reason for filtering for cancelled SIMs is to obtain a history of all previous instances when the device was activated and what the assigned MSISDN was in each instance.
If you want to view a simple list of all cancelled devices, use the Activate SIMs menu item and filter for cancelled SIMs.
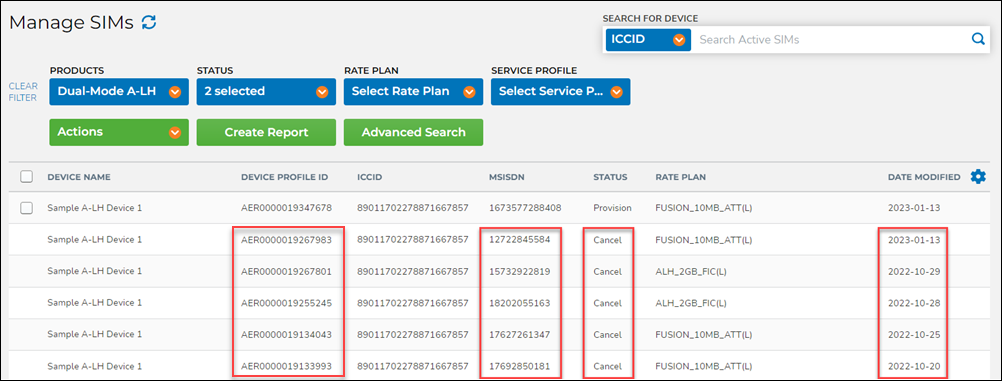
In the following example, "Sample A-LH Device 1" is currently activated, and you can see that it has been cancelled 5 previous times. The Date Modified column shows when the change occurred, and the Device Profile ID and MSISDN columns show different values for each time the SIM was active.
0 Comments